پردازش اسناد را روی زیرساخت خود اجرا کنید
Run it locally or on your own infrastructure
A lightweight self-host version designed for developers. No complex setup, no external dependencies — just download, run, and start using Documentize in under a minute.
⚡ Quick Start
Choose the setup that fits your workflow. Both options take only a few steps.
.NET 9 (fastest way)
If you already have .NET installed, this is the quickest way to get started.
- Download the self-host package
- Extract the archive
- Run:
dotnet Documentize.SelfHost.dllThen open http://localhost in your browser.
Docker
Prefer containers? Use the included Dockerfile to run Documentize anywhere.
- Download the Docker package
- Build the image:
docker build -t documentize .Run the container:
docker run -p 80:80 documentizeThen open http://localhost.
🧩 Requirements
Minimal requirements depending on your setup:
- .NET 9 Runtime for direct execution
- Docker for containerized setup
⚙️ More Details
The self-host version is built as a standard ASP.NET Core application, so it behaves exactly like any modern .NET web API.
- Runs locally or on any server
- Default Docker port: 80
- No external services required
- Suitable for internal tools or production use
🔑 Licensing & Subscription
Without a license the API runs in Trial Mode — output files may contain evaluation watermarks. Apply a license to enable full, watermark-free processing.
Free vs. paid tier
Every request — with a key or without one — runs under one of two allowances. A paid subscription is what lifts both the daily quota and, if the key is an active paid subscription, the Aspose watermark.
| Free / no key | Paid subscription | |
|---|---|---|
| Operations per day | 5 | Unlimited |
| Max file size | 10 MB | Unlimited |
| Concurrent operations | 2 | 8 |
| Aspose watermark | Applied | Removed |
A paid subscription is proven to the instance by a signed key — either fetched automatically for you (Option 3) or issued manually (Option 4) — never by an environment variable you set yourself: those numbers are compiled into the binary and cannot be raised any other way.
Option 1 — Environment variable
Base64-encode your .lic file and pass it as an environment variable before starting:
# Linux / macOS
export ASPOSE_PDF_LICENSE=$(base64 -w 0 Aspose.Pdf.lic)
dotnet Documentize.SelfHost.dll
# Docker
docker run -p 80:80 \
-e ASPOSE_PDF_LICENSE=$(base64 -w 0 Aspose.Pdf.lic) \
documentizeOption 2 — Upload via API
POST the .lic file to your running instance at any time.
curl -X POST http://localhost/webapi/license \
  -F "license=@Aspose.Pdf.lic"
Check the current license status at any time:
GET http://localhost/webapi/license
# { "licensed": true }
Option 3 — Activate with your Documentize account (recommended)
If you already have a Documentize account with an active subscription, you don't need an Aspose .lic file at all. Create a SelfHost activation key below (requires signing in), then set it as an environment variable on your instance. The instance uses the key to call the Documentize API roughly every 6 hours and fetch a short-lived signed entitlement — whatever plan is active on your account is reflected automatically, with no further action from you when you upgrade, downgrade, or renew.
# Linux / macOS / Docker
export DOCUMENTIZE_API_TOKEN=dmk_your_activation_key
This API token is not the same as the "Copy API token" button in the sidebar — that one is a short-lived login token for the hosted Documentize web app. The activation key created below is a separate, long-lived, single-purpose credential: it can only be used to refresh a SelfHost instance's entitlement, and it can be revoked here at any time, which stops the next refresh from renewing that instance — the instance simply keeps running on its last-known entitlement until that grant's own short expiry, then falls back to the free tier.
Independent of Options 1, 2 and 4 — use whichever fits your deployment; an instance is free to run more than one method side by side (a per-request key always wins if you send one — see below).
Option 4 — Manually issue a subscription key (advanced)
Options 1–3 are for the plans sold through the Documentize website. If you are distributing your own long-lived (monthly, yearly, or perpetual) subscription keys — for example as a vendor bundling SelfHost for your own customers — the Documentize.SelfHost binary can mint them itself, offline, from the command line. Neither command touches the network or starts the web server.
First, generate a signing key pair once (keep the private half secret):
dotnet Documentize.SelfHost.dll --new-signing-key
# PUBLIC  (ship this — DOCUMENTIZE_SUBSCRIPTION_PUBLIC_KEY):
# MIIBIjANBgkqhkiG9w0BAQEFAAOCAQ8AMIIBCgKCAQEA...
#
# PRIVATE (keep secret — needed only to issue keys):
# MIIEvQIBADANBgkqhkiG9w0BAQEFAASCBKcwggSjAgEA...
Set the public half as DOCUMENTIZE_SUBSCRIPTION_PUBLIC_KEY on every instance that should trust keys you issue (a Release build can also have it baked in at compile time). Then issue a key for a customer:
dotnet Documentize.SelfHost.dll --issue-key "<privateKeyBase64>" \
  '{"sub":"customer-123","email":"buyer@example.com","plan":"Pro Yearly","tier":"paid","period":"year","exp":1798761600}'
# DMZ1.eyJzdWIiOiJjdXN0b21lci0xMjMiLCJ0aWVyIjoicGFpZCIsLi4ufQ.MEUCIQD...
Give the printed DMZ1.… value to the customer to set as:
# Linux / macOS / Docker
export DOCUMENTIZE_KEY=DMZ1.eyJzdWIiOiJjdXN0b21lci0xMjMiLC4uLn0.MEUCIQD...
# or, for a docker secret / k8s mount:
export DOCUMENTIZE_KEY_FILE=/run/secrets/documentize_key
Payload fields: sub/email/plan are freeform, shown back on /webapi/usage. tier is "free" or "paid". period is "month", "year", or "perpetual". exp is a Unix timestamp (seconds) the key stops working at — omit it (or set 0) for a perpetual key that never expires. You can optionally cap dailyOps, maxFileMb, or maxConcurrent per key for a bespoke plan; leave them out to use the standard paid-tier numbers above.
This key never expires from your side and never phones home — the instance verifies it completely offline, forever, unless you also set DOCUMENTIZE_KEY_REFRESH_URL to let it check for revocation periodically. This is the right tool for a key you are selling or handing out yourself; Option 3 above is the right tool for a customer with a Documentize account who just wants their own subscription reflected automatically.
🔑 Your SelfHost activation keys
No account needed to try this out — Create key below issues a free trial key on the spot. Sign in (top of the page) to list or revoke keys later, or to upgrade to a paid plan for full limits.
Copy this key now — it is stored only as a hash and cannot be shown again.
Set it as an environment variable on your instance:
This is a free trial key — it works at the same limits as a free account. Sign in to keep it listed for later, or upgrade to a paid plan for full limits.
Existing keys
| Label | Key | Created | Last used |
|---|
Presenting a key on a single request
Whichever option you use, a DOCUMENTIZE_KEY/DOCUMENTIZE_API_TOKEN set on the instance is the default for every request. You can also override it per request, e.g. to test a different key without restarting the instance — any one of these three works, and a per-request key always wins over whatever the instance is configured with:
# Dedicated header
curl http://localhost/webapi/usage -H "X-Documentize-Key: DMZ1...."

# Standard bearer auth (what Swagger UI's Authorize button sends)
curl http://localhost/webapi/usage -H "Authorization: Bearer DMZ1...."

# Query string, for clients that can't set headers
curl "http://localhost/webapi/usage?key=DMZ1...."
Checking your current status
Free, no key required:
GET http://localhost/limits        # human-readable
GET http://localhost/limits.json   # machine-readable
GET http://localhost/webapi/usage  # your own tier, plan, usage today, and licensing status
/webapi/usage reports the same tier/plan a browser sees on the Documentize account page (email, plan name, days left in a term key), plus licensed/licensing fields explaining exactly why the Aspose watermark is or isn't applied right now — the first place to check if paid processing doesn't look the way you expect.
🖥️ Using the desktop & terminal clients with your local instance
The Windows, Linux, and TUI clients normally talk to the hosted Documentize API. You can point them at this self-host instance instead, so files are processed on your own machine and never leave your network.
Let the Windows client run the engine for you
The Windows client has a built-in copy of this engine — you don't need .NET or Docker installed separately.
- Open Settings → Run Documentize on this computer.
- Click Install — the client downloads
Documentize.SelfHostto%APPDATA%\PDFCON\self-hostand starts it on a local loopback port. - Click Use locally to route all operations to it.
When you are signed in with a paid subscription, the client fetches a signed entitlement for the local engine automatically (the same mechanism as Option 3 above), so full limits and watermark-free output work with no extra setup.
Point any client at an instance you started yourself
If you run this engine directly (dotnet Documentize.SelfHost.dll or the Docker image), connect any client to it with a provider profile:
- Start the instance and note its URL —
http://localhostfor the defaultdotnetrun, or the port you mapped for Docker. - In the client, open Settings and add/edit a provider profile:
- Kind: Documentize REST
- Base URL:
http://localhost/webapi/(keep the trailing/webapi/) - API Key (optional): empty for the free tier, or a SelfHost activation key /
DMZ1.…key to send per request.
- Select that profile as the active one and save.
Licensing the instance itself is done with any of Options 1–4 above; the client's API Key field is only for presenting a key on a single client's requests.
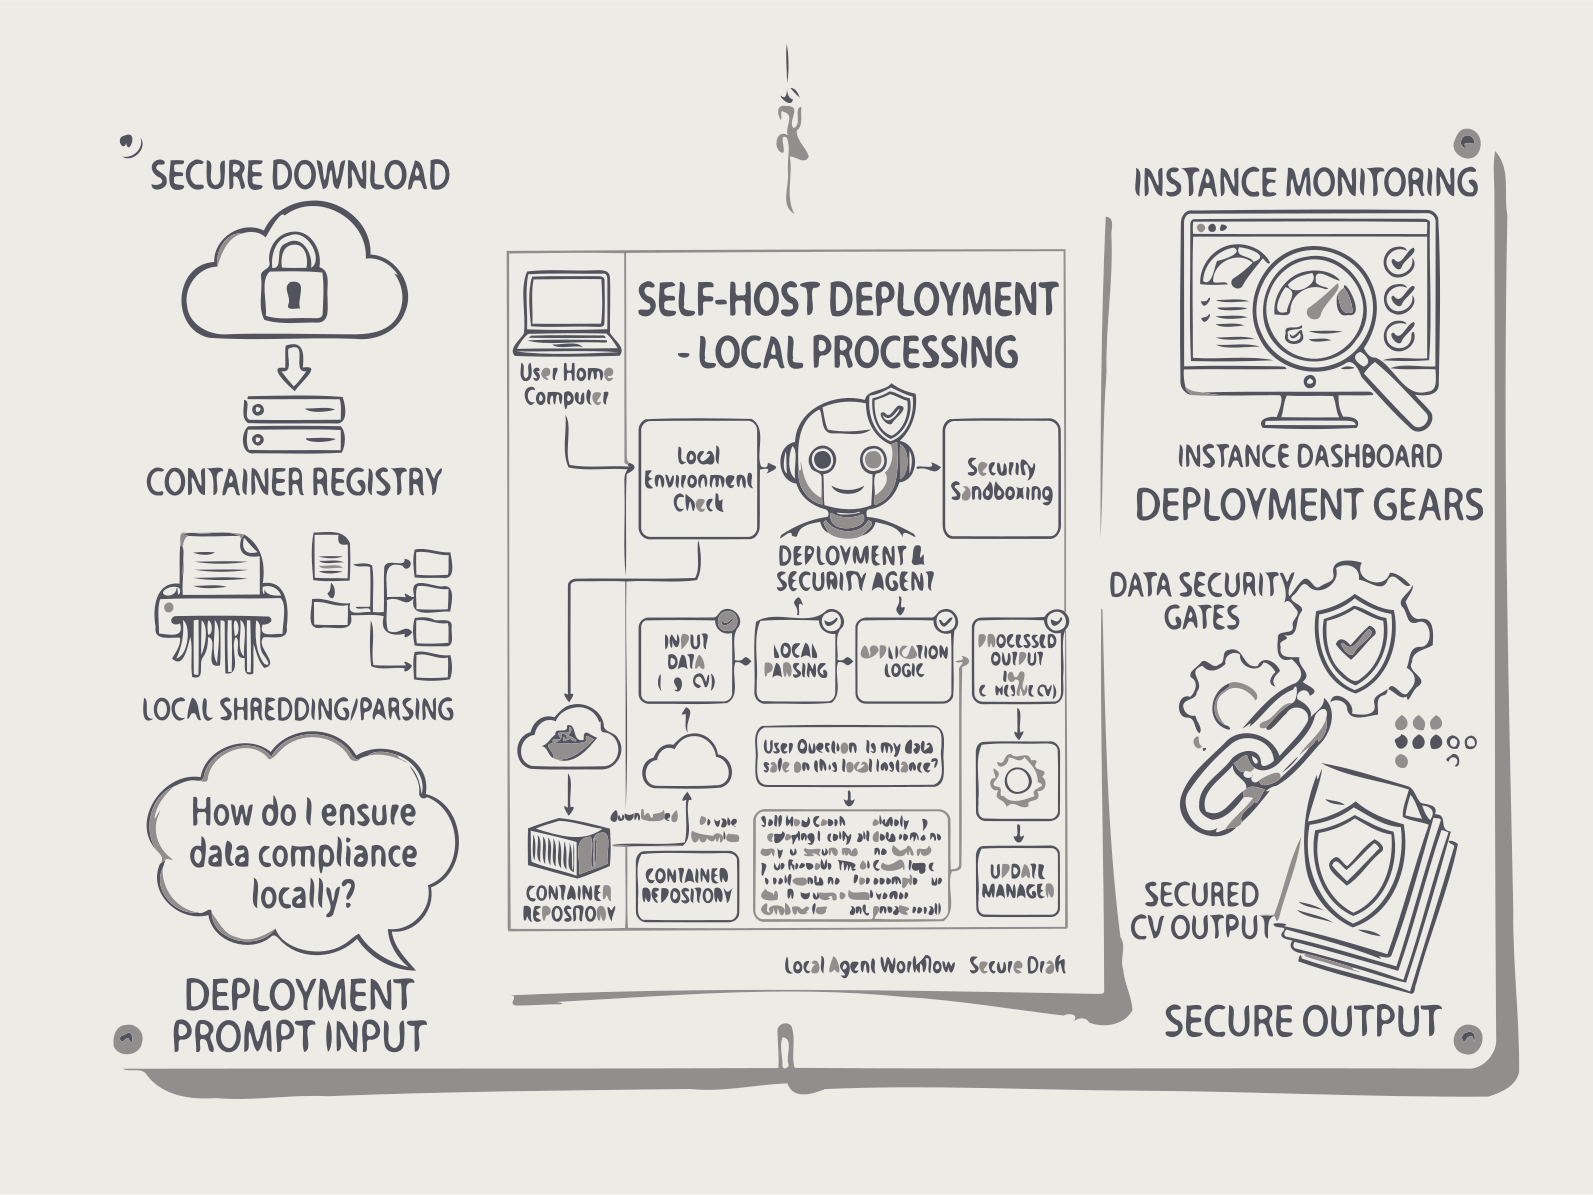
Documentize AI را بر روی زیرساخت خود مستقر کنید، با یک API REST یکپارچه برای خودکارسازی اسناد محلی و کنترل کامل دادهها.
Documentize AI را بهصورت کامل بر روی زیرساخت خود مستقر کنید و کنترل کامل دادهها را داشته باشید. راهحل پردازش سند خود میزبانی ما یک API یکپارچه REST برای خودکارسازی اسناد محلی فراهم میکند — ایدهآل برای سازمانهای دولتی، مراکز بهداشتی، مؤسسات مالی و هر محیطی که پردازش ابری باعث ایجاد ریسکهای انطباق یا امنیتی میشود. بر روی سرورهای ویندوز یا لینوکس با پشتیبانی از Docker اجرا میشود، پس از استقرار بهصورت کاملاً آفلاین، با احراز هویت LDAP یا OAuth. همان قابلیتهای پلتفرم ابری ما، بدون خروج داده از فایروال شما، ثبت کامل لاگهای حسابرسی برای هر عملیات سند.
نحوهٔ کارکرد Documentize خود میزبانی
1. راهاندازی API
API REST و پردازشگرها را در محیط خود با Docker یا بهصورت محلی اجرا کنید.
2. ارسال اسناد از طریق REST
فایلها و پارامترها را به نقاط پایانی API برای تبدیل، OCR، جستجو یا پردازش هوش مصنوعی بارگذاری کنید.
3. پردازش پسزمینه
وظایف بهصورت ناهمزمان پردازش میشوند و وضعیتشان قابل ردیابی و اجرای پیشبینیشده است.
4. دریافت نتایج
پس از تکمیل کار، اسناد پردازششده یا نتایج ساختار یافته را دانلود کنید.
FAQs
API اسناد خودمیزبانی
قفلگذاری PDF
قفل کردن اسناد با رمز عبور از طریق API REST.
بازکردن قفل PDF
باز کردن اسناد محافظتشده با رمز عبور از طریق API REST.
تبدیل سند
تبدیل اسناد بین فرمتهای پشتیبانیشده.
ادغام سند
چندین سند را در یک فایل خروجی واحد ترکیب کنید.
تقسیم PDF
تقسیم اسناد بر اساس صفحات یا قوانین تعریفشده.
پردازش OCR
تشخیص متن از اسناد اسکنشده و تصاویر.
PDF جستجوپذیر
تولید PDFهای جستجوپذیر از فایلهای اسکنشده.
جستجوی PDF
جستجو در محتوای متنی داخل اسناد.
حذف صفحه
حذف صفحات PDF.
چرخاندن صفحه
چرخاندن صفحات سند.
فشردهسازی PDF
فشردهسازی صفحات سند.
امضای دیجیتال
امضای دیجیتال اسناد با استفاده از API.
تأیید امضای PDF
تأیید امضای دیجیتال در اسناد.
فهرست مطالب
تولید خودکار فهرستهای مطالب.
تولید چکلیست
تولید چکلیستهای ساختاریافته از اسناد با استفاده از هوش مصنوعی.
تولید تصویرسازی
تولید تصویرسازیهای مبتنی بر هوش مصنوعی برای محتوای سند.
کاملاً رایگان
طرح پرمیوم
- دسترسی کامل به تمام برنامههای Documentize AI
- محدودیتهای پردازش روزانه گسترش یافته
- پردازش اولویتدار و پشتیبانی رایگان
طرح پرمیوم
- دسترسی کامل به برنامههای Documentize
- ابزارها و ویژگیهای پیشرفتهتر
- محدودیتهای پردازش فایل گسترشیافته
- پشتیبانی رایگان