Satu Hub untuk Semua Klien Documentize
Desktop & Terminal clients for PDF processing
Native clients that connect to the Documentize API directly from your desktop or terminal. No browser required — pick the version that fits your OS and workflow.
One Premium subscription licenses every developer tool — no separate license to buy.
- MCP server
- CLI
- Self-Host
- Desktop
Enable your paid subscription
Desktop and terminal clients don't share your browser session, so they need your API token to unlock your paid subscription. Sign in on the web app, open the side menu, and click Copy API token to copy it to your clipboard — then paste it into the client as described below. Once an API key is set, it's sent with every request and takes priority over any signed-in session, so the client uses your subscription immediately. Leave the field empty to sign in interactively instead; either method gives the client access to your paid plan.
- Open the client and go to Settings (in the TUI, it's on the main menu).
- Paste your copied token into the API Key field of your profile — labeled "API Key (optional)" in the Windows and Linux clients, "API Key:" in the TUI (input is masked).
- Save the profile — the client now uses your subscription on every request.
Windows (MAUI)
The Windows client is built with .NET MAUI and runs natively on Windows 10 or later.
Requirements
- Windows 10 version 1809 (build 17763) or later
- x64 processor architecture
Setup
- Download and extract
pdfcon_windows.zip - Run
PDFCON.exefrom the extracted folder
No installer is required — the package is self-contained and runs directly after extraction.
Linux (Avalonia)
The Linux client is built with Avalonia UI and supports X11 and Wayland display servers.
Requirements
- 64-bit Linux (Ubuntu 22.04+ or equivalent)
- X11 or Wayland display server
- Required libraries:
libfontconfig1,libfreetype6,libglib2.0-0,libgl1
Setup
- Download and extract
pdfcon_linux.zip - Install required dependencies if not already present:
sudo apt-get install -y libfontconfig1 libfreetype6 libglib2.0-0 libgl1- Make the binary executable and run it:
chmod +x ./PDFCON
./PDFCON
TUI — Terminal client (cross-platform)
A lightweight terminal interface built with Terminal.Gui. Runs entirely in the console with no display server required — ideal for servers and headless environments.
Requirements
- Windows 10+, Linux, or macOS
- Any terminal emulator (xterm, Windows Console, iTerm2, etc.)
Setup on Windows
- Download and extract
pdfcon_tui.zip - Open a terminal and run:
PDFCON.Tui.exeSetup on Linux / macOS
- Download and extract
pdfcon_tui.zip - Make the binary executable and run it:
chmod +x ./PDFCON.Tui
./PDFCON.Tui
Run everything on your own computer (self-host)
By default the clients send files to the hosted Documentize API. You can instead point them at a self-host instance of the engine — the same API, running on your machine or your own server — so documents are processed locally and never leave your network. There are two ways to do this.
Option A — let the Windows client run the engine for you
The Windows client can download and run the engine itself, no .NET or Docker required.
- Open Settings → Run Documentize on this computer.
- Click Install. The client downloads
Documentize.SelfHostinto your user profile (%APPDATA%\PDFCON\self-host) and starts it on a local loopback port. - Click Use locally. The active provider switches to "Documentize (on this computer)" and every subsequent operation runs on-device.
If you are signed in with a paid subscription, the client fetches a signed entitlement key from your account and passes it to the local engine automatically, so watermark-free processing and full limits work with no extra steps. Stopping the engine or choosing a cloud profile again switches back.
Option B — point a client at an instance you already run
If you started Documentize.SelfHost yourself (see the self-host guide — dotnet Documentize.SelfHost.dll or the Docker image), add a provider profile that targets it. This works from the Windows, Linux, and TUI clients.
- Start your instance and note its URL —
http://localhostfor the defaultdotnetrun,http://localhost:8080if you mapped Docker to another port. - In the client, go to Settings and add (or edit) a provider profile:
- Kind: Documentize REST
- Base URL:
http://localhost/webapi/(keep the trailing/webapi/) - API Key (optional): leave empty for the free tier, or paste a SelfHost activation key /
DMZ1.…subscription key to unlock full limits on that instance.
- Make the new profile the active one and save.
Licensing the local instance (Aspose .lic, an activation key from your account, or a self-issued DMZ1.… key) is configured on the instance itself — see Licensing & Subscription on the self-host page. The per-request API Key field above is only needed when you want a specific client to present its own key.
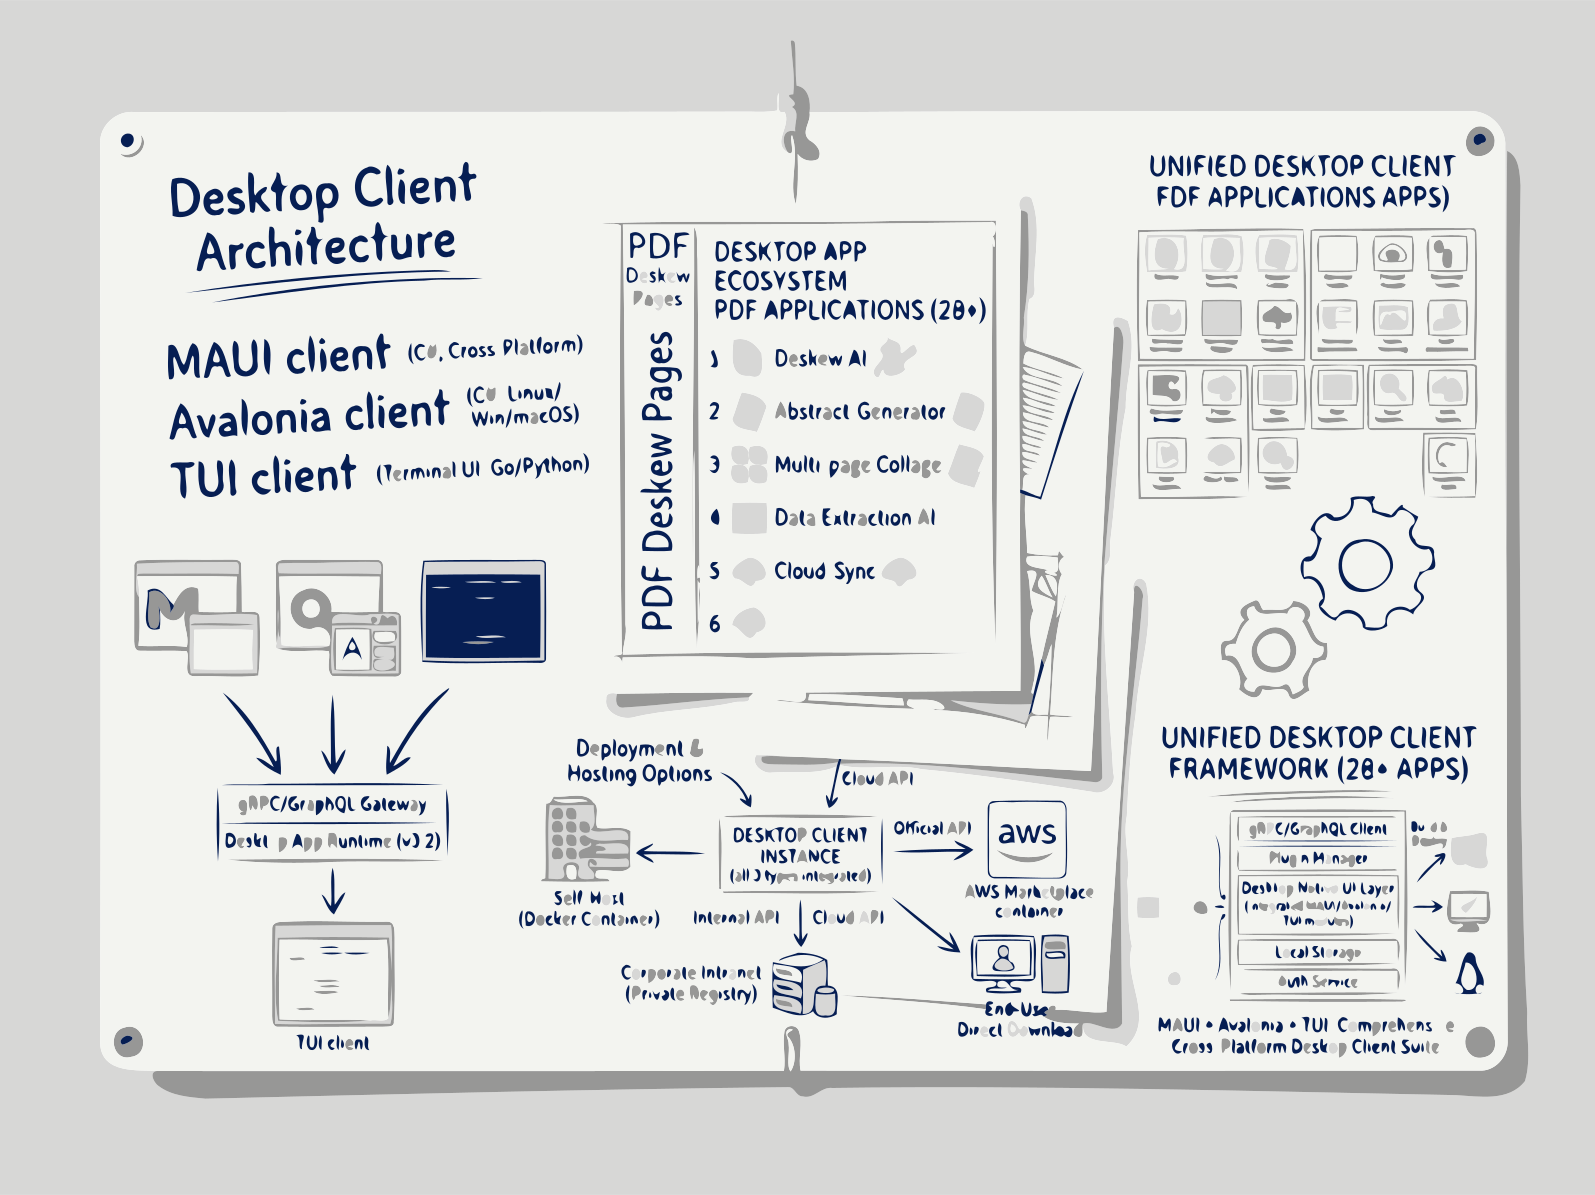
Pilih platform Anda, unduh klien, dan mulai menyinkronkan dengan cloud Documentize atau API pribadi Anda dalam hitungan detik.
Documentize Desktop menghadirkan pemrosesan PDF dan dokumen dalam klien native: aplikasi Windows, aplikasi Linux, dan klien terminal yang juga berjalan di macOS. Masuk ke cloud Documentize dengan token API Anda, atau sambungkan ke server self-hosted agar file diproses di mesin Anda sendiri.
Cara Memulai
1. Pilih Klien Anda
Pilih Desktop untuk pengalaman GUI atau Terminal untuk alur kerja baris perintah.
2. Unduh & Pasang
Klik tombol unduh, jalankan installer atau ekstrak arsip, dan luncurkan aplikasi.
3. Sambungkan ke Documentize
Masukkan kredensial cloud Anda atau konfigurasikan endpoint API yang dihosting sendiri untuk mulai menyinkronkan dokumen.
4. Sinkronkan & Gunakan Fitur AI
Semua file Anda disinkronkan secara instan, dan saran, ringkasan, serta pencarian yang didukung AI tersedia di mana saja.
FAQs
Klien Desktop Documentize
Dukungan Cloud TerpaduSelf‑Host
Terhubung ke Documentize SaaS atau API on‑premise Anda sendiri dengan UI dan perintah yang sama.
Bantuan Bertenaga AI
Ringkas, cari, dan hasilkan konten langsung dari klien menggunakan mesin AI terintegrasi.
Mode Offline
Bekerja offline; perubahan akan diantre dan disinkronkan ketika Anda terhubung kembali.
Harga
Paket Gratis
- Semua klien desktop dan CLI, sinkronisasi tak terbatas, koneksi cloud atau mandiri.
Paket Premium
- Akses penuh ke semua aplikasi Documentize AI
- Batas pemrosesan harian yang diperluas
- Pemrosesan prioritas dan dukungan gratis
Paket Premium
- Akses penuh ke aplikasi Documentize
- Alat dan fitur yang lebih canggih
- Batas pemrosesan file yang diperluas
- Dukungan gratis